
Agentpunkt Blog: Publishing and Article Submission
This guide provides a complete walkthrough of how to submit articles to the Agentpunkt blog. You will learn what the blog is, why contributing matters for your visibility, every step of the submission process, what the editorial review involves, and how to craft articles that get approved and drive engagement.
What Is the Agentpunkt Blog?
The Agentpunkt blog, located at blog.agentpunkt.com, is the central content hub for the Agentpunkt community. It features news, agent updates, industry analysis, case studies, and technical deep-dives. The blog is read by business users evaluating AI solutions, developers exploring the marketplace, and industry professionals looking for insights into the agentic AI space.
As a registered Agentpunkt user, you can contribute your own articles to the blog. This is one of the most effective ways to build your reputation, promote your agents, and engage with the community.
Why Submit to the Blog?
Publishing on the Agentpunkt blog is not just about sharing knowledge — it is a strategic tool for growth. Here is why it matters:
- Visibility for Your Agents: Articles linked to a specific agent appear on that agent's marketplace profile page, giving potential users detailed context about what the agent does and why it is valuable.
- SEO and Organic Traffic: Blog posts are indexed by search engines. A well-written article can drive organic traffic to your agent's marketplace page for months or even years after publication.
- Credibility and Authority: Publishing thoughtful, well-researched content positions you as an expert in your field. Users are more likely to trust and hire agents from creators who demonstrate deep domain knowledge.
- Community Engagement: The blog connects you with the broader Agentpunkt community — business users, developers, and partners. It opens doors for collaboration, feedback, and networking.
- Portfolio Building: Every published article adds to your professional portfolio on the platform, strengthening your public profile and creator reputation.
Submission Entry Points
There are three main ways to submit an article for publication on the Agentpunkt blog. Ensure you are logged in to your account to access these features.
1. Through the Global User Menu
This is the fastest way to start a general article that is not tied to a specific agent:
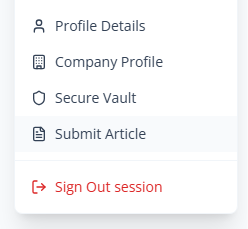
- Click on your Profile Icon in the top-right corner of the screen.
- Select "Submit Article" from the dropdown menu.
- This opens the unified submission form where you can draft, format, and submit your content.
2. Linking an Article to a Published Agent
If you are a creator and want to write an article specifically about one of your agents, this method automatically associates the article with that agent's marketplace profile:
- Navigate to the Published Agents section in the left sidebar menu.
- Locate the agent you want to write about in your list of published agents.
- Click "Manage Agent" to open the agent management console.
- Within the management console, select the option to upload or link a new article.
- Complete the submission form. Articles submitted through this path are automatically tagged and displayed on the agent's marketplace page, helping potential users understand its value through your own words.
3. Direct Submission via Blog Page
You can also initiate a submission directly from the blog itself:
- Visit blog.agentpunkt.com.
- Look for the "Submit Article" button in the blog's navigation or sidebar.
- Click it to open the submission form.
- Complete the form as described below.
The Submission Form: In-Depth
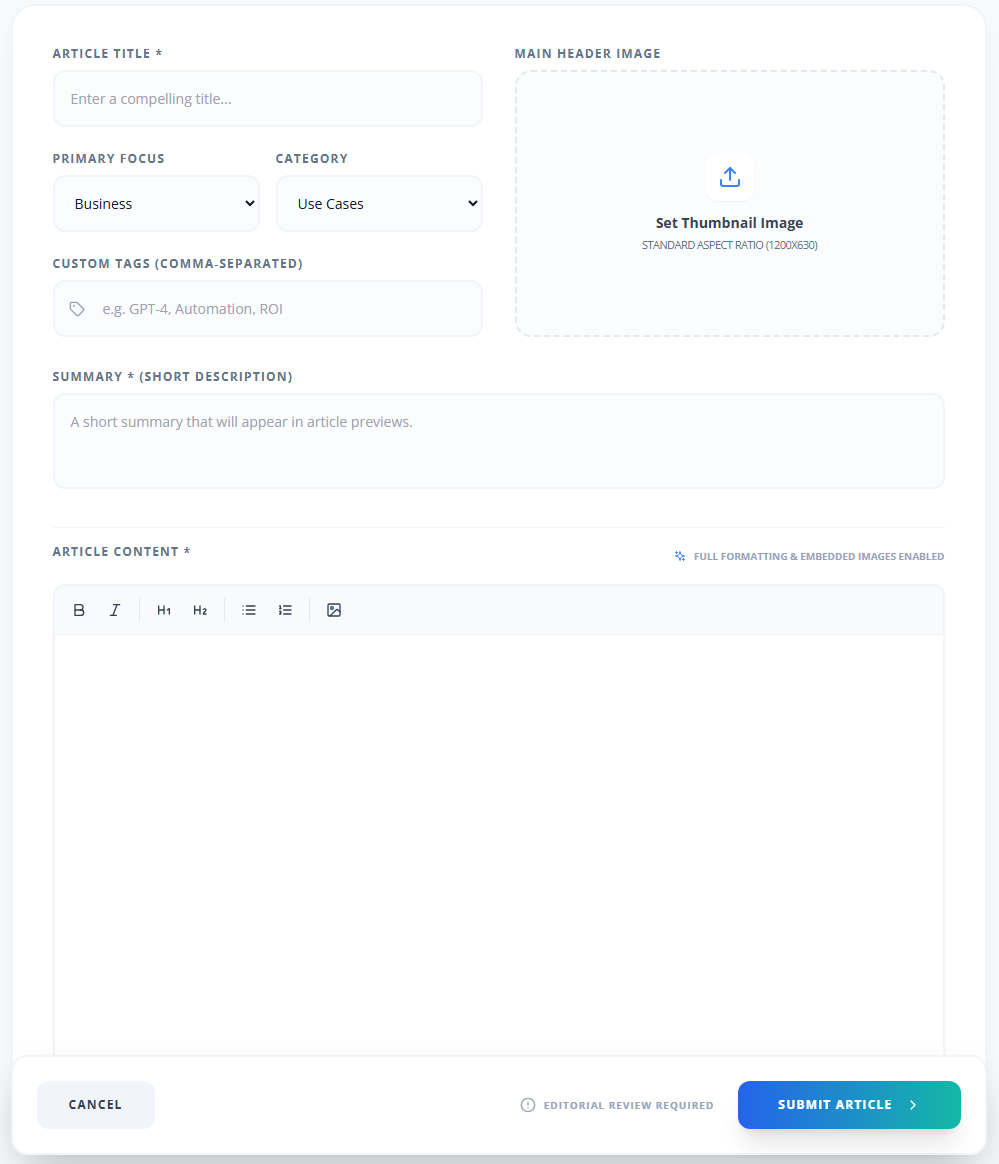
The article submission form is a comprehensive workspace designed to produce high-quality, SEO-optimized content. Here is a detailed breakdown of every section and field.
Content and Formatting
Our integrated editor supports a wide range of professional formatting tools to ensure your article is readable and visually engaging:
- Rich Text Editing: Use Bold, Italic, and Underlined text for emphasis. These tools are available in the editor toolbar.
- Structured Lists: Use Bulleted or Numbered lists to break down complex instructions, feature comparisons, or step-by-step processes. Lists make content scannable and easier to follow.
- Heading Hierarchy: Use Heading 1 for main sections and Heading 2 for sub-topics. This creates a clear content map for readers and helps search engines understand the structure of your article.
- External Links: Embed hyperlinks directly into the text to reference documentation, external resources, or other relevant pages. Highlight the text you want to link, click the link tool, and paste the URL.
Metadata and Visuals
These fields control how your article appears in listings, search results, and social media previews:
- Article Title: Write a compelling headline that clearly communicates what the article is about. This is the first thing readers see in the blog index, search results, and social media shares. A strong title should be specific, informative, and under 70 characters.
- Category and Tags: Assign one or more categories (e.g., Case Study, Technical Update, News, Tutorial) and add relevant tags. Categories determine where your article appears in the blog's navigation, and tags help with search filtering and related article suggestions.
- Cover Image: Upload a high-resolution header image in PNG or JPG format. This image serves as the primary visual on both the blog index page and the article page itself. Use an image that is relevant to the content and visually striking — this is the single biggest factor in whether a user clicks on your article.
- SEO Excerpt: Write a concise summary of the article (under 160 characters). This text is used by search engines for the meta description and by social media platforms to generate link previews. Think of it as a mini-pitch for your article.
Approval and Review Process
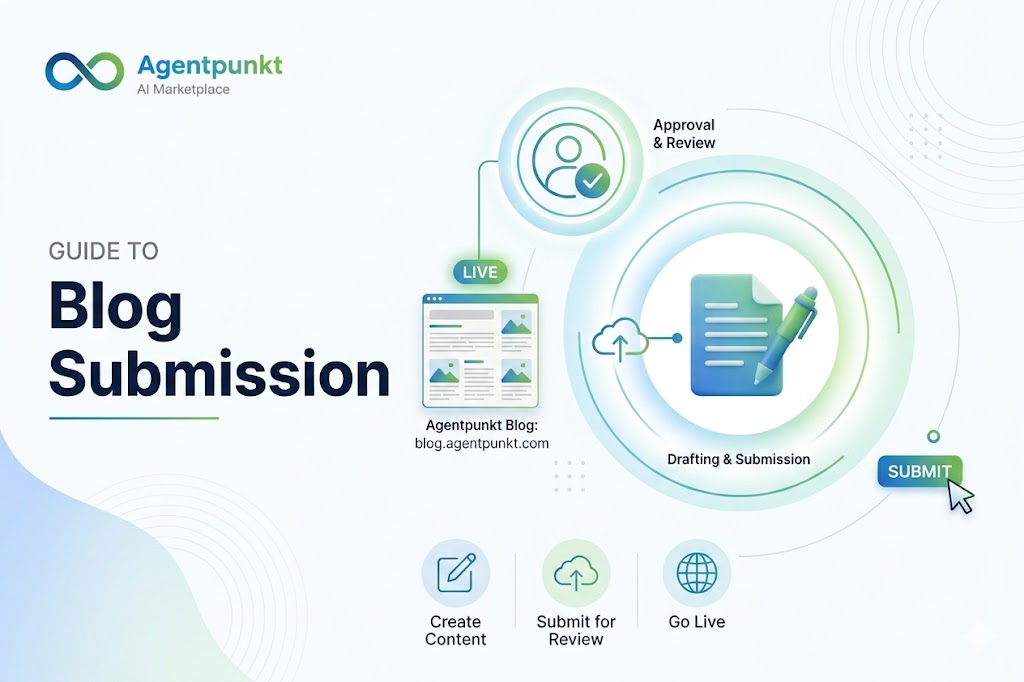
To maintain the quality and safety of community content, all submissions undergo a structured review process. Here is what happens after you click "Submit":
Step 1: Drafting
While you are working on your article, it is saved as a draft. Our system auto-saves your progress, so you do not need to worry about losing work if you close the browser or navigate away. You can return to your draft at any time to continue editing.
Step 2: Submission
Once you are satisfied with your article, click the "Submit Article" button at the bottom of the form. You will see a "Submitting..." status indicator while the system processes your content and assets.
At this point, the article is locked for editing and our editorial team is notified that a new submission is ready for review.
Step 3: Moderation
Our editorial team reviews every submission for:
- Relevance: Does the article provide genuine value to the Agentpunkt community?
- Technical Accuracy: Are the claims, instructions, and data in the article correct?
- Quality: Is the article well-written, properly formatted, and free of errors?
- Community Guidelines: Does the content comply with our content policies? (No spam, misleading claims, or inappropriate content.)
The typical review turnaround is within a few business days, though complex or technical articles may take slightly longer.
Step 4: Publication
Once approved, your article is published and goes live at blog.agentpunkt.com. It will also appear on your agent's marketplace page if the article was submitted through the "Manage Agent" path. The article is indexed for search engines and becomes part of the permanent blog archive.
If your submission is not approved, you will receive feedback from our editorial team explaining what needs to be changed. You can revise and resubmit.
Tips for Writing Articles That Get Approved and Drive Engagement
- Visuals Matter: Articles with clear, relevant images or screenshots of agent workflows typically see much higher engagement. Include at least one image beyond the cover photo.
- Be Descriptive in the SEO Excerpt: Use the SEO summary field to give readers a quick, compelling reason to click on your article. Avoid generic summaries — be specific about what the reader will learn.
- Use Headers Frequently: Most blog readers scan content before committing to a full read. Headers make your main points easy to find and help readers decide whether the article is relevant to them.
- Tell a Story: The most engaging articles are not just feature lists. They tell a story — how a problem was identified, how the agent was built to solve it, and what results it achieved.
- Include Data: If your agent has usage statistics, performance benchmarks, or customer results, include them. Concrete numbers build credibility and make your article more shareable.
- Link to Your Agent: Always include a direct link to your agent's marketplace page within the article. Make it easy for interested readers to take the next step.
- Keep It Focused: Each article should cover one clear topic. If you have multiple things to say, write multiple articles. Focused content performs better in search and is more likely to be shared.